If you’ve been hunting for the smoothest, most feature-rich IPTV player for your Amazon Firestick, TiviMate is consistently at the top of every recommendation list — and for good reason. It’s clean, fast, customizable, and handles large channel lists without breaking a sweat. Whether you’re pairing it with iboPlayMedia or any other IPTV provider, this guide walks you through every single step to get it running perfectly in 2026.
Let’s get into it.
What Makes TiviMate Worth the Setup?
Before jumping into the how-to, it’s worth understanding why TiviMate has become the go-to IPTV player for serious streamers. Unlike many free alternatives, TiviMate offers:
- A sleek, TV-friendly interface that’s actually enjoyable to navigate
- Smooth EPG (Electronic Program Guide) with multi-day scheduling
- Catch-up TV support (where your provider offers it)
- Multiple playlist support so you can manage several IPTV subscriptions in one place
- Picture-in-picture mode, parental controls, and recording features
- A premium version (TiviMate Premium) that unlocks the full feature set
The free version works for basic streaming, but for the full experience — especially with iboPlayMedia — the Premium version at a few dollars per year is genuinely worth it.
What You’ll Need Before You Start
Make sure you have the following ready before beginning:
- An Amazon Firestick (any generation, including Fire TV Stick 4K and 4K Max)
- A stable Wi-Fi connection (or Ethernet adapter for Firestick)
- Your iboPlayMedia IPTV subscription credentials (M3U URL or Xtream Codes details)
- A free Amazon account (already set up on your Firestick)
- About 15–20 minutes of uninterrupted time
That’s genuinely all you need. No technical background required.
Step 1 — Enable Apps from Unknown Sources
TiviMate isn’t available directly on the Amazon App Store, so your first move is to allow your Firestick to install apps from outside Amazon’s ecosystem. This is a one-time setting change and takes less than a minute.
- From your Firestick home screen, go to Settings (the gear icon in the top menu)
- Select My Fire TV
- Tap Developer Options
- Toggle Apps from Unknown Sources to ON
- Confirm the warning prompt by selecting Turn On
Your Firestick is now ready to sideload apps. This setting doesn’t expose your device to any risk as long as you’re only installing from trusted sources — which you will be.
Step 2 — Install the Downloader App
The Downloader app is the tool that bridges the gap between your Firestick and apps not found on the Amazon Store. It’s free and available directly from Amazon.
- Press the Home button and go to the search icon
- Type Downloader and select it from the results
- Choose the orange Downloader icon (by AFTVnews)
- Select Download and wait for it to install
- Open Downloader once it’s installed
- Allow any permissions it requests
When Downloader opens for the first time, it will ask if you want to enable JavaScript — select Allow. This lets it handle web-based downloads properly.
Step 3 — Download and Install TiviMate
Now the main event. You’ll use Downloader to grab the TiviMate APK directly.
- Inside Downloader, tap the URL bar at the top
- Type the following address exactly: https://tivimate.com
- Navigate to the download section of the site and grab the latest APK
- Alternatively, search for “TiviMate APK latest 2026” in the Downloader browser to find the most current version
- Once the download completes, Downloader will automatically prompt you to install it
- Select Install and wait for the process to finish
- When installation completes, select Done (not Open — you’ll open it from a better place in a moment)
Pro tip: After installing, go back into Downloader, tap the menu (three lines), select Files, and delete the APK to free up storage space on your Firestick. Storage matters on these devices.
Step 4 — Add TiviMate to Your Home Screen
By default, sideloaded apps don’t appear on your Firestick’s main home screen. Here’s how to find and pin TiviMate:
- From the home screen, scroll right to Your Apps & Channels or See All
- Scroll through the full app list to find TiviMate
- Highlight TiviMate, press and hold the Select button on your remote
- Choose Move to Front or Add to Home depending on your Fire OS version
Now TiviMate will be easily accessible every time you want to stream.
Step 5 — Launch TiviMate and Add Your iboPlayMedia Playlist
This is where your IPTV subscription comes to life. Open TiviMate for the first time and you’ll see a clean welcome screen prompting you to add a playlist.
If your iboPlayMedia subscription uses an M3U URL:
- Select Add Playlist
- Choose M3U Playlist
- Enter your M3U URL exactly as provided by iboPlayMedia (copy it carefully — one wrong character breaks it)
- Give your playlist a name (e.g., “iboPlayMedia”)
- Tap Next and let TiviMate load your channel list
If your iboPlayMedia subscription uses Xtream Codes (API login):
- Select Add Playlist
- Choose Xtream Codes API
- Enter your Server URL, Username, and Password as provided
- Tap Next to connect
Xtream Codes is generally the preferred method when available — it loads faster, supports catch-up TV more reliably, and gives TiviMate richer EPG data to work with.
Once connected, TiviMate will begin syncing your channels. Depending on the size of your playlist, this can take anywhere from 30 seconds to a few minutes. Let it complete fully before browsing.
Step 6 — Set Up Your EPG (Programme Guide)
The EPG is what separates a great IPTV experience from a basic one. It gives you a full TV schedule so you can see what’s on now, what’s coming up, and set reminders — just like a real cable TV guide.
TiviMate usually pulls EPG data automatically from your playlist URL. But if it doesn’t populate:
- Go to Settings inside TiviMate
- Select Playlists then tap your iboPlayMedia playlist
- Find the EPG URL field and enter the EPG link provided by iboPlayMedia
- Save and tap Update EPG Now
Set your EPG to auto-update every 24 hours so your guide always stays current.
Step 7 — Upgrade to TiviMate Premium (Recommended)
The free version of TiviMate limits you to a single playlist and disables several useful features. For iboPlayMedia users who want the full package, Premium is the upgrade that makes everything click.
How to upgrade:
- Inside TiviMate, go to Settings
- Select Account
- Choose Get Premium
- You’ll be redirected to sign in with or create a TiviMate account
- Complete the purchase (available as a yearly subscription or lifetime option)
Once activated, your Premium features unlock immediately — multiple playlists, recording, parental controls, and the archive/catch-up functions all become available.
Step 8 — Customize TiviMate for the Best Experience
Now that everything is running, spend five minutes tuning TiviMate to your preferences:
Favorites: Long-press any channel and select Add to Favorites to build a curated list of your most-watched channels at the top.
Channel Groups: TiviMate organizes channels into groups (Sports, News, Movies, etc.) from your playlist. Go to Settings → Playlists → Groups to hide categories you never use and declutter your guide.
Video Player: For 4K streams, go to Settings → Player and switch to an external player like MX Player if you experience any playback issues. TiviMate’s internal player handles most streams well, but external players give you more codec support.
Parental Controls: Under Settings → Parental Controls, you can PIN-lock specific channel groups — useful if children use the same device.
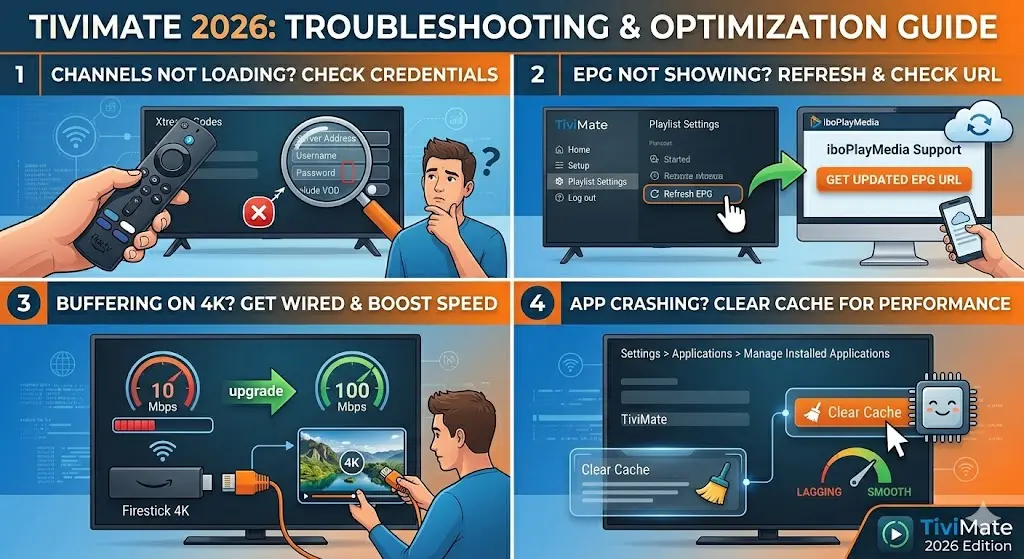
Common Issues and Quick Fixes
Channels not loading after setup: Double-check your M3U URL or Xtream Codes credentials. Even a single extra space causes connection failures.
EPG not showing: Manually refresh EPG under playlist settings. If it still fails, your provider’s EPG URL may have changed — contact iboPlayMedia support for the updated link.
Buffering on 4K channels: Switch from Wi-Fi to a wired Ethernet connection using a Firestick Ethernet adapter. Also check that your internet speed meets the 25–35 Mbps minimum for 4K streams.
App crashing on older Firesticks: Clear TiviMate’s cache under Firestick Settings → Applications → Manage Installed Applications → TiviMate → Clear Cache.
Final Thoughts
TiviMate on a Firestick is genuinely one of the best IPTV setups you can build in 2026. The combination of a fast, intuitive interface, rock-solid EPG support, and deep customization makes it the player of choice for iboPlayMedia subscribers who want their streaming to feel premium — not patched together.
Follow this guide step by step, take two minutes to upgrade to Premium, and you’ll have a setup that rivals any cable or satellite package — at a fraction of the cost. Once it’s running, you’ll wonder why you waited this long to make the switch.